


How to Make Your Own Soap at Home - Soapmaking Pt.2

Gnarly, Dude...
The drying ravages of winter and summer and cause our skin to look and feel very much downright gnarly! Because some family members really liked the olive oil castile soap for their dry skin, I decided to do my second posting on the simple process of making this type of soap. “Castile” soap is simple. Three ingredients: distilled water, oil, lye. That’s it.

I made my first batch with extra virgin olive oil and just recently made another batch using coconut oil. I wanted to see if the coconut oil castile bar would keep its hardness better during use. Not that the olive oil bar was a problem, by any means, but I just want to see if there’s a difference in starting with an oil that never hardens like olive oil and a saturated oil like coconut oil. Each of these oils has amazing health properties for your skin, so you can't go wrong with either. (See my post-note at the end of this article.) Now, technically, it’s not castile soap if it’s not made with extra virgin olive oil. But for my purposes here, we’ll just call it all castile. (Which, by the way, is a term derived from the castle regions in Spain.) I guess you could become a soap snob and have a real problem with me calling anything else castile - but I know you have better things to do!
The Recipe
Here’s the recipe I’ve used both times:

Castile Soap
50 ounces extra virgin olive oil or coconut oil (or perhaps another oil?)
15 ounces of distilled water
6.3 ounces of lye
Of course, you might choose to use some essential oils for skin-healing properties and fragrance as well. (Lavender, Geranium, Neroli, Sandalwood, for instance) I recently heard from a friend how he added grated lemon peel to his soap which I thought would be a wonderful addition to a castile soap made with extra virgin coconut oil!
The Process 
Refer to my Soapmaking, Part 1 for a list of all the tools for a smooth soapmaking experience. You’ll want a pot to warm your oil to 110 degrees. You can put your pot on your measuring scale, tare it and then measure in the 50 ounces of oil. Place the pot with the oil on a very low setting on the stovetop. Next, measure out your water in a glass pitcher, the deeper the better. Again, you can set it on the scale, tare and measure it out that way - or, as I did with my coconut oil soap, just use your measuring cup to measure out the water by the ounces labeled on the measuring cup. Final measurement is the lye. Choose your vessel to contain the lye for measuring - either glass or stainless steel is best. Tare the vessel and then carefully pour in your 6.3 ounces of lye. As I stated in Part 1, I’ve been using Roebic drain cleaner. It’s 100% pure beaded lye.

A friend once taught me a soapmaking maxin: Always think of “snow falling” when adding lye to the water. To add water to the lye would be a big mistake and possibly a destructive, painful one. Always pour the lye atop the water. (Keep vinegar handy while you’re making soap in case of splashes. I needed some with my recent batch as I got a couple acid burns from the lye splashing in the water even though I had rubber gloves on. Vinegar immediately neutralizes lye. It’s also not a bad idea to go over all your work surfaces with vinegar when you’re done making soap.) So - you have your oil gently warming and now you will carefully add your lye into your water pitcher. Stir (use a plastic or stainless steel spoon) until it reaches 110 degrees also.
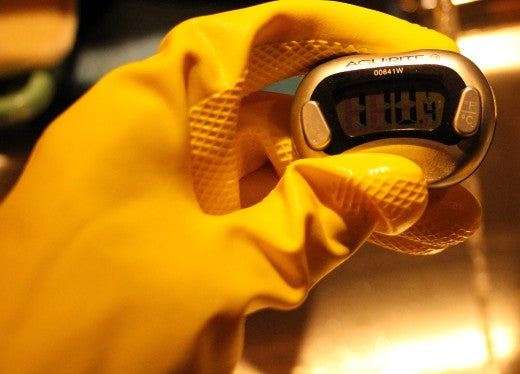
Remember to have all of your utensils and thermometers, etc. exclusively for the use of soapmaking. You would never want to get an accidental bead of lye into any food. I just keep a bin of soapmaking supplies and use those tools for soapmaking only. When you get both the oil and the lye mixture to 110 degrees (I confess, both of mine were a wee bit lower for my coconut oil soap and it seems to have worked fine), then you pour the lye water into the oil and blend with your soapmaking stick blender.

When you reach trace (see Part 1), pour immediately into your prepared pan. I used an 8 X 11 inch baking pan for this recipe.

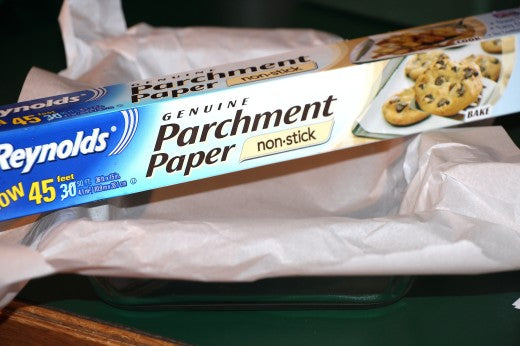
Note: remember to line your glass, wood, plastic or other nonreactive pan with parchment paper so you can lift the soap out of the pan the next day for cutting into bars.
Time To Cut Into Bars I leave my soap sit in the pan 24 hours and then, after removing it from the pan and flipping onto a cutting board, cut it into bars.

The Wait Is Worth It! 
Let your bars cure for at least a month, but for castile soap, at least 3 months is recommended to get a longer-lasting bar. I’ve had my first batch for 9 months now and I think they could still use a bit more curing, but they are by far, my longest lasting bars. I’ve heard that leaving the castile soap for the length of time it takes to make it good and hard is the decisive factor for either loving it or hating it. I think my olive oil bars smell a bit “old” now, that’s another reason I wanted to try coconut oil. I wish I could’ve afforded to use extra virgin because that smells so incredible, but I just used a cheaper variety of coconut oil (Golden Barrel) for this experimental batch. 50 ounces is a lot of oil! But, I now have 20 bars of soap too! And each bar leaves luxurious, soothing traces of that oil on your skin after use. And that is heavenly on parched winter skin!
 My dry winter hand Even adorned by a fun ice bauble ring, it's not too attractive!
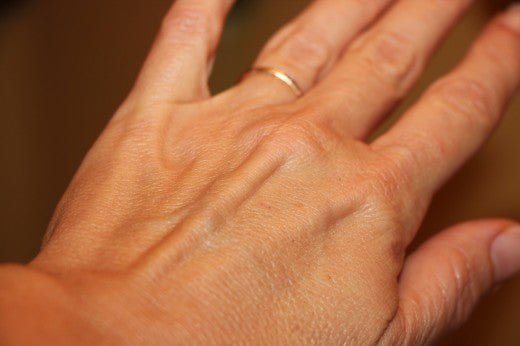
My hand with the care of the castile soap - still not young hands, but much less dry!
Post - note: The soap made with coconut oil, ironically - despite coconut oil's amazing healing and hydrating properties by itself- caused our skin to dry out. This was very disappointing! But we've found it makes a great multi-purpose camping bar and is fine to use during humid summer weather when *nothing* can dry one's skin out! So, for great hydration - stick to the olive oil.
Leave a comment