DIY - Hunting / Survival 3-Piece Take Down Arrows

For survival hunting it’s hard to beat a sling or take down bow, but there is one inherent problem with these tools: arrows!!! You see, full length arrows easily snag in brush and tree limbs on the trail, can be easily be bent or broken, and are hard to conceal.
The solution? Yep, you guessed it... DIY 2- or 3-piece take-down arrows.

The cool thing is that you can custom build your own take down arrows easily and affordably at home.
Here’s What You’ll Need: 
- Good Quality Aluminum or Carbon Arrows... I recommend arrows with larger fletching
- A Tape Measure
- A Fine Sharpie Marker
- Glue - I recommend 5 Minute Epoxy or Arrow Adhesive
- 1000-Grit Sand Paper
- One 32 Teeth-Per-Inch Hack Saw Blade
- A Plastic Miter Box
- Bow String Wax
- A Small Piece of Scrap Wood
- A Pair of Leather Gloves
- A Clean Dry Rag
- A Few Cotton Swabs and Toothpicks
- Denatured Alcohol (Optional) And for the Most Special Part - A Few Sets of Male and Female Arrow Inserts
To Start... Lets Cut the Arrow
First, remove the point from your arrow if it has one installed.

For two-piece take down arrows, simply measure the length of the arrow and mark the half- way point with your sharpie.
For three-piece arrows divide the total length (from tip to nock) by 3 and make your marks. For my YouTube video I made a 3-piece carbon fiber take down arrow (since 3-piece carbon take down arrows are the trickiest to make ... but these techniques apply to 2-piece and aluminum arrows as well.
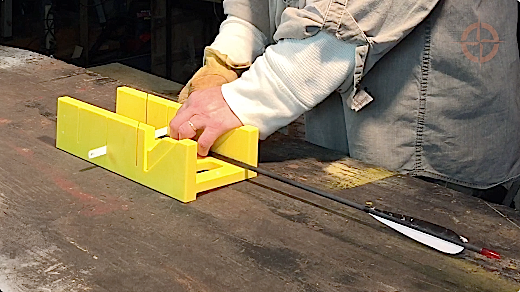
HOW TO CUT YOUR ARROW SHAFT To make the cuts square and precise without fraying the fibers of your carbon arrows, it’s best to take your shaft to a local bow shop to make the cuts for you. If you choose to do it yourself, the most affordable way is to purchase a plastic miter box. I think I paid like 7 bucks for mine, and you’ll need a 32 teeth-per-inch hacksaw blade. Now place the arrow in the miter box with your first mark lined up with the perpendicular cutting slots and tight up against the inside wall.
With a glove on your strong hand, grasp the end of the hacksaw blade with the arrow on the blade pointing toward you and with the teeth down.
Insert the hacksaw blade in the slot and start cutting back and forth with slow, even strokes and minimal pressure. Don’t press hard... let the blade do the work... slow and steady wins the day.
It’s important to get a clean straight cut. One cut may take 2 or 3 minutes so be patient. Be especially careful toward the end, since it’s easy to rush it and end up pulling some carbon fibers off your shaft.
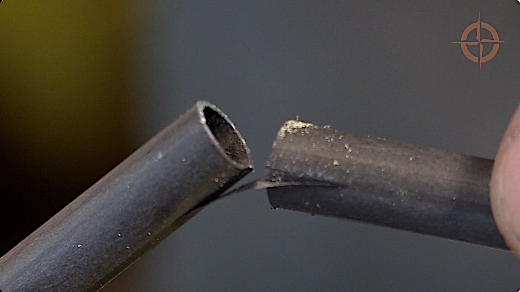
If this happens DO NOT use your arrow. Either attempt a clean cut below the frayed area or discard your arrow.

SQUARE UP EDGES Next grab your piece of 1000-grit automotive sand paper. With sand paper on a flat surface, square up any imperfections from your cuts and lightly sand the edges.
Remove any dust and debris from the outside using your rag or cotton swab. If you want to use a cleaning solvent, denatured alcohol is best.
INSTALLING INSERTS AT EACH JOINT To construct the safest possible take down arrows that you can, you will need 1 set of special aluminum inserts for each joint and the proper adhesive to hold them in place.

I have done extensive research and have only found one maker of the special male and female inserts that you need. They come in packs of 6 pairs for around $20 US at the time of this review. So you’ll get enough inserts for 6 two-piece or 3 three-piece take down arrows. Here is a link for those so you can grab some.
BEWARE BAD ONLINE INFO 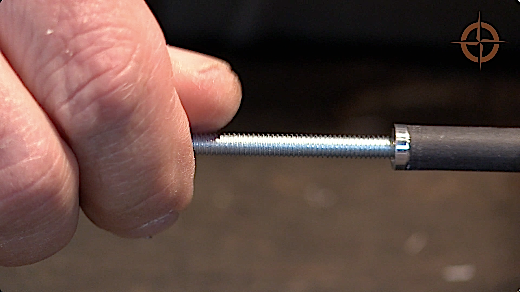






Leave a comment