Lard For Life! I know wayyyyyyyy back in the “good ol’ days” there was an ad that said, “Lard for Life.” My husband and I saw it in an old magazine in an antique store somewhere and had a good guffaw. That was before fat-free freaks were dying in their tracks of heart attacks and before the transformational works of Weston A. Price, lauding the health benefits of clean animal fats came out of the closet. Now my purpose in this article is to teach you how to render pig fat, but I realize you might have no clue of why on earth you might want to ever do such a thing. So hang on for a very quick nutritional primer…

So What's the Truth About Fats? Simply said – our very lives depend on ingesting good fats. Weston Price was a dentist that purposed to study the teeth and corresponding diets of isolated, “primitive” people groups and what happened when their diets became modernized with processed foods. He went from one remote region to another all around the globe and emerged with about 11 consistent principles of healthy eating which were common to all of the diverse indigenous diets. We’re just going to look at one, but if you want to read more (you really should!)
here’s a link to his book from these travels. It’s a fascinating read! I just read a chapter a night and before you know it, 500 pages of a travelogue and undeniable nutritional conclusions is covered. The principle I’m getting at here is stated by the
Weston A. Price Foundation this way: Total fat content of traditional diets varies from 30% to 80% but only about 4% of calories come from polyunsaturated oils naturally occurring in grains, pulses, nuts, fish, animal fats and vegetables. The balance of fat calories is in the form of saturated and monounsaturated fatty acids. Check it out! Saturated fat is GOOD for human beings?? Um, yes. It is. My grandfather who lived to be 90 with no physical ailments until his very last days dipped his bread in bacon grease - every morning. I used to think that was a fluke, but now I understand he was enabling his body to absorb key nutrients and minerals.
Here is a link to an article by the Weston A. Price Foundation. Why reinvent the wheel when they explain things so well? You can scour their site for lots of cutting-edge (actually very traditional, but formerly hidden) nutritional information.

Now on to Rendering Lard! I was happily surprised to receive a phone call in which I was offered to take off of someone’s hands 25 pounds of pastured, organic pig fat. Ironically, I had been wanting to make lard so this really was an answer to prayer! I had done some research into rendering and – may I just say- that’s just a fancy word for melting down the solid fat into a liquid, straining off the liquid and then letting it get solid again- and I found some differing views on how to do it…so I did a few batches, all differently, in order to share with you the results.
First Steps Deciding which tool to use for heating up the fat is tricky. You don’t want your fat to burn or it will make it too “piggy” smelling/tasting. As white and odorless as possible is the goal. Of course, if you are blessed enough to get what they call “leaf” fat – which is taken from the area around a pig’s kidneys and is the cleanest of all the fats from a pig- you are lucky. My bag was a mish mash and I’m pretty sure there was no leaf fat in it. The leaf fat is what you want for pastries and such because even with very careful rendering, the other fat comes out with pork overtones. I was bummed when I realized I didn’t have any of "the good stuff", but went for it anyway to benefit you all. Plus the result was very nice –I did use half butter and half lard in some scones after my first batch and they were sensational, so I’m pleased. I have a store of lard now for frying and other dinnertime uses and can slip some into baked goods if I’m clever. Plus if I ever get around to making soap – I’m going to pull some out for that! Anyhoo – I did my first batch in my electric turkey roaster, set to 225 degrees and subsequent batches in my crockpot – first on low (which was too hot!) and then on the Keep Warm setting, which was perfect. My friend did hers in the oven, and I guess that worked well for them. You don’t want it to overcook and my batch that got too hot and boiled was definitely my strongest smelling batch.

The Preparation of the Fat After selecting your vessel of doom, pour a little water – I poured about a cup but as little as ¼ cup is fine- into the bottom. You just want a cushion there to keep any fat from scorching until it gets heated. The water will evaporate. The next thing you do is cut up your fat into chunks. I cut my first batch up verrrryyy small, as I had read that it enables more to be rendered from it. It did take awhile and my hand was good and sore from slicing into the very fibrous fat. I wound up using
one of my hubby’s survival knives, which worked so much better than my kitchen knife! I’ve heard that grinding your fat is even better, but I didn’t have that choice. Putting the fat into a food processor did come as a thought and just as quickly left as I struggled to remove the fat which seemed suctioned to the knife blade. It definitely would have been a mess in a processor and probably would have burned out my motor.
Add Some Heat So, you fill up your
turkey roaster or
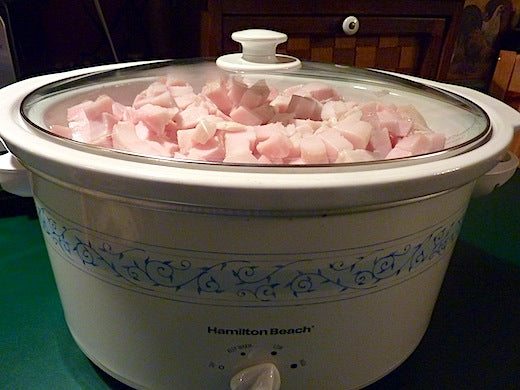
crockpot or pan for the oven and then turn on the heat, remembering to keep it low! I had 25 pounds to render and it wound up taking me 3 days, doing 3 batches of an average of 8.5 pounds. It worked good for me to break it up. I still had a life in between batches. (Actually took a day off between the first and last two batches.)
Let your fat heat up and stir it often to keep it from scorching at all. You’ll soon see the juicy fat start to be released from the fibers. It seemed there was a saturation point where no more was coming out, so that is when I decided to pour out the contents and glean my lard.


Gleaning for Storage I had a
huge glass measuring cup with a
huge strainer lined with a quadruple thickness of
cheesecloth set up for ladling now very reduced chunks of fat and the liquid lard into. I chose to re-render my chunks aka cracklings, as they still seemed able to be reduced even more and I was right. My first go-around yielded 6
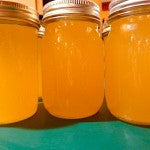
pints of lard while my second skimmings added 2 more pints to that. So for 10 pounds of pork fat, I walked away with 8
pints of lard, having cut my pieces small and used the turkey roaster at 225 degrees. Oh – one extra tidbit. I had read about 2 ways to make lard whiter: add ½ tsp. baking soda in when it begins to render OR put some pieces of potato in to the finished product and swirl them around. My results? Neither showed any remarkable difference.

Subsequent Batches in the Crockpot Next batch went into my
7-quart crockpot. I set it on low, and having started late in the day, hoped I could leave it overnight and deal with it in the morning. Around 2am, with pork odor permeating my sleep, I awoke to go check on things. It was bubbling away down there and was burning to the edges. Not good. So at 2 am, I strained it all and poured it into a flat
glass 13X9”dish. I was thinking that putting a lot of
pint jars into my freezer for storage wasn’t a very space-savvy idea and decided that making lard “bricks” made more sense for long-term storage. You definitely want to refrigerate or freeze your finished lard if you’re going to keep it any length of time. Do not use it rancid! Any rancid oil is cancer-causing! BUT you can use rancid lard for soap-making.

Right then and there I decided I was ready to be done with rendering pork fat to move on with life, so I cut up the last of it all around 3am and put it into the crockpot also – this time on the Keep Warm setting. I took up a post on the couch where I could also keep the woodstove stoked and checked on it in a couple hours. It proceeded wonderfully, and at around 9 am, I was pouring out the results from that batch. I could have done a second run with the cracklings, but decided to let the birds enjoy them instead. Finished!
Here's the entire haul from 25 pounds of pig fat.
About cracklings…the remains after rendering are called cracklings and if you fry them up crisp after you extract all the oil, supposedly they are quite delicious. I really wanted to try it, but my husband wasn’t keen on the idea and I frankly was just too tired by the time I got to pouring out each batch to want to mess with it all further. So I missed out on the cracklin’ experience. :-( I’m the type that probably would have loved them! Well, here’s to "lard for life" – and health!


Leave a comment