


Making Apple Cider Vinegar: Whys and Hows

It’s been cited as a panacea for just about every human ill from sore throats to incontinence to heart disease to aging and touted as a cleaning agent and health and beauty product as well, with many using it in such diversified capacities as a facial toner and hair rinse....what is “it”? Apple Cider Vinegar! And those functions leave out its main role of simply being a FOOD - a delicious vinegar and enhancement to many recipes. Let's look a little more closely at why we would want to make our own and then learn how!
Some History Vinegar’s earliest recorded usage seems to be from the 5000 B.C. era where the Babylonians are recorded to have made a vinegar from date palm wine. Since then it has recorded usage as a food preservative, a medicinal agent, an antibiotic and household cleaner. It’s ant-microbial properties (it kills “bad” microorganisms) have made history way back then to present day...It literally was one of humanity’s first medicines with Hippocrates using it as an antibiotic and mixing it with honey for catarrhal concerns. In the American Civil War, vinegar was used to prevent scurvy - caused by vitamin C deficiency, as well as serving as a disinfectant and healing agent for wounds. Dr. D.C. Jarvis, a hearty Vermonter, was possibly the most widespread voice for the virtues of apple cider vinegar, in particular, and prescribed it often in his practice as a highly trained and professionally esteemed country doctor. Dr. Jarvis gave folk medicine some credentials. (Check out his book entitled Folk Medicine for an interesting read if you haven’t already.) Now “playing” with people’s health is no game and we should all be very circumspect in using natural remedies, studying out the properties of every medium for healing along with potential side effects and dangers. However, in the spectrum of all natural cures, there are some that are just “safe” and useful- even fortifyingly preventative- to almost any person in need. Apple cider vinegar would fall into this category.
Benefits of Apple Cider Vinegar For the purposes of this article, I will not go into great detail on the effects of alkalinity in one’s body but suffice it to say, many roots of disease are strengthened by this factor. Apple cider vinegar is acetic acid -and very useful in balancing body pH. In addition, it is rich in potassium, which, to quote Dr. Jarvis “is so essential to the life of every living thing that without it there would be no life.” Essentially, potassium promotes cell, tissue and organism growth. ACV also contains many enzymes, calcium, iron and magnesium - all necessary for smooth body functioning and bolstering of immunity. Start With Apples

The best apple cider vinegars are made by grinding whole organic (unsprayed) apples into pulp and then cold-pressing to extract the cider, allowing the cider to ferment in wooden barrels and age for at least 6 months. A bushel of apples will yield a couple gallons of cider. If you have the benefit of being able to purchase organic raw pressed cider locally then you are a couple steps ahead of the game. You “can” make cider without a press, by grinding your apples in a food processor or- in a survival situation-with whatever you can devise for the purpose, saving all the juice and then squishing the daylights out of the pulp through some cloth. This obviously would be quite labor intensive but is very do-able! Another idea is to make your own press. Check out this page for directions on making your own. I have friends that have a cider-making party yearly, where people bring wild-picked apples from wherever they can harvest them, pool all the apples together and then take home a proportion of the resulting cider. It is such a great way to build community and enjoy the healthy results to boot! Women bring food and men crank the homemade cider mill. Another option for making your own cider would be to purchase your own cider press from among Lehman’s non-electric products or even on Amazon.

After the Cider, What Next? So, assuming you have some organic, raw cider, let’s move on to making the apple cider vinegar, shall we? For me, I am always looking for the simplest means to an end. So I have poured my apple cider into a gallon-sized glass jar. Never use a random metal container! Glass, wood, enamel or stainless steel are all good choices so the acid doesn’t corrode your container. (Think corroded canning rings from acidic foods....) Some people add a packet or cake of yeast to their cider to speed up the process. I chose not to do this. (Do not use bread yeast but rather, specially cultivated yeasts for wine-making are recommended. )
Watching the Bubblies Form Leave the top of your container open, but covered in a way that it can "breathe". I initially covered mine with cheesecloth but wound up with determined fruit flies squeezing through my doubled cheesecloth. I switched to a cotton fabric cover instead, secured on with a rubber band. I have read that at this point you should use an airlock system that allows the carbon dioxide out and keeps any bacteria from entering in. Because I wanted to try this as primitively as possible, I chose not to use the airlock top. Store the container out of direct sunlight and in an area where the temperature will be between 60-80 degrees Fahrenheit. Stir your cider daily to aerate it and enable the bacteria to enjoy more oxygen. The bubbling you will see is the bacteria feeding on all that yummy sugar content.

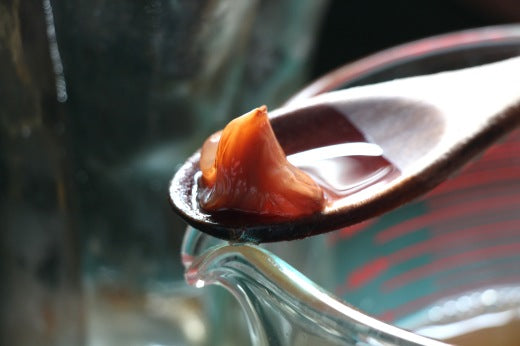
From Hardness to Vinegar You will notice after a couple weeks (w/o added yeast) that you have made a nice apple wine aka hard cider. You will want to go further and allow all of the alcohol to change into acetic acid. If you were using the airlock, at this point you would remove it and cover your top with cloth to allow oxygen to cavort with the yeast spores of the alcohol. Also, if you have a mother from another batch of vinegar you want to add, this is the time to introduce that. Again, I have chosen not to do this because I want to see what I get with nothing but the apples. Mine is still not vinegar yet and I am told this could take months -even years- to occur, especially if your room temperatures are on the cooler end of the recommended range! Once it becomes vinegar-ish, taste samples daily until the desired strength of the vinegar is reached.
Contrary to Popular Opinion Because apple cider vinegar is antibacterial, antiviral and antifungal, you do not need to pasteurize it. To do so kills the mother - the host of all the fresh enzymes- and essentially all of the beneficial properties of this vinegar. You don't need to worry about the vinegar "going bad", as it will only mature and develop more potency and desirable smoothness of quality while allowing the mother to grow. If you had a mind to, you could create "vintage" vinegars by letting them age in a cool dark place for years! Store your vinegar in capped containers, preferably glass in a cool location out of direct sunlight. If you wanted more mother in your vinegar, you could put it into the light, which causes the mother to grow.
Make Some Four Thieves Vinegar Consider taking some of your homemade vinegar and adding dried herbs such as rosemary, lavender, sage, mint, rue and/or plantain and some fresh cloves of garlic and leaving it sit for 6-8 weeks in a cool dark place to create a powerfully antiseptic, antibacterial, antiviral, antifungal elixir. Strain out the herbs after they have steeped for the allotted time and bottle up your elixir for when those nasty illnesses threaten. With what we have going around today, this is a formula every family should have on hand! When you feel something coming on, take a tablespoon (adults - a teaspoon for children) diluted in tea or water a few times a day. You can also use it to disinfect surfaces and mix some with equal part of water to just spray into the air as well.
A Final Note Regarding the acidity of homemade vinegars: the sweeter your cider was to start with, the more acidic will be the resultant vinegar. So just be aware that you don’t have a standardized acidity to your homemade product as the store-bought versions are created to be through dilution. If you want to measure the acidity of your vinegar there are kits available, but a simpler way to determine if your vinegar is where you want it is to do a pH test with inexpensive pH strips. Apple cider vinegar is expected to have a pH of between 4.25-5.0, with the lower reading being the stronger acid content. For pickling, a vinegar should not have a higher pH than 4.0, which is a level that will still inhibit bacterial formation and mold. Feel free to share in the comments any of your own experiences or helpful tips in making apple cider vinegar! Apple cider vinegar truly is a valuable asset to any medicinal arsenal and is delicious besides!
Leave a comment