Sharpen Any Knife - Anywhere - With This Pocket Carry Tool

Size - This sharpener is 7 inches (or 18 centimeters) long and roughly an 1inch (or 2.5 centimeters) high and wide (at the widest points)... and weighs only 4.6 ounces (or 129 grams).
Five Sharpeners in One 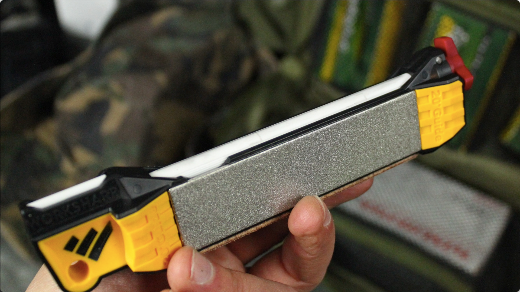 - The Guided Field Sharpener body is constructed from what seems to be pretty tough, reinforced, injection molded plastic and includes 5 major sharpening surfaces: -A removable coarse and fine diamond sharpening plate -A long 3-position ceramic rod for coarse honing, fine honing and a position for sharpening fish hooks -A smaller ceramic rod for touching up serrated edges and on the other side we have a leather strop for polishing an edge to razor sharp.
Diamond Plates  Both of the diamond sharpening plates are interchangeable and are held firmly on the tool with powerful magnets that have secured the plates on my original Field Sharpener for over 2 years. The coarse plate removes to reveal a rectangular compartment that contains a rolled-up, 2-sided, full-color, step-by-step instruction sheet on how to use the tool... which is helpful if you’re new to this tool.
Broadhead Wrenches - Under the fine plate are 2 broadhead wrenches that bow hunters will find useful for removing most 2, 3 and 4-blade hunting points so that they can be honed. And just in case you lose or decide to remove your instruction sheet... 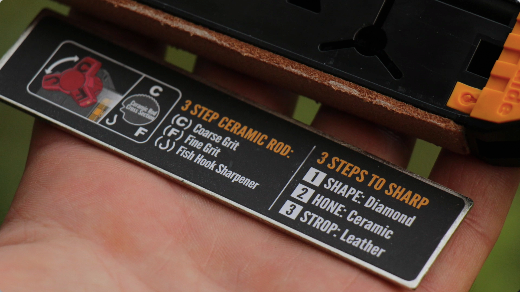 Work Sharp outlines the basics of using the tool with a sticker on the underside of the fine sharpening plate.
Now Let’s Sharpen a Knife...  For sharpening most outdoor knives, Work Sharp couldn’t have made it more simple. The major problem for MOST people when using a sharpening stone is keeping a consistent angle between the blade and the stone. To overcome this issue, Work Sharp built into this tool 20-degree guides adjacent to the ends of both the fine and coarse diamond sharpening plates. To use the tool, lay the tool down on a flat, stable surface with the fine plate up (it's the smoother of the two plates).
  Grasp the handle firmly with one hand. Lay the knife flat on the guide closest to the handle, with the base of the cutting edge in contact with the stone. Now push the blade away from you in a natural, circular motion, with an even stroke, while maintaining the angle set by the guide. Make sure that the entire edge makes contact with the abrasive surface during each stroke.
Take Your Time 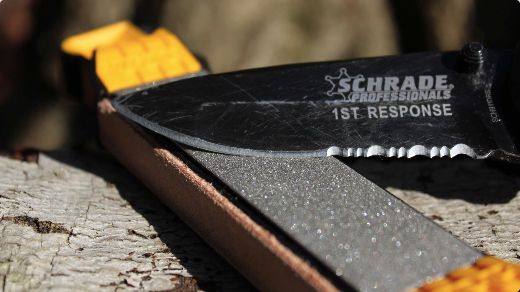 It’s important to take your time and not to bear down on the stone... let the diamonds do the work. Repeat for 5 to 10 strokes on one side (make sure to count them)... And then on the opposite side by pulling the knife toward you (but be careful) ... Repeat this process multiple times....checking the sharpness of the blade after each set. A well-maintained edge may only need 5 to 10 strokes per side... a dull edge may need a LOT more.
Once the Blade is Sharp...  Rotate the tool 90 degrees so that the long ceramic sharpener is facing up. Now turn the red knob so that the F is facing up... exposing the fine ceramic sharpener.
  Now with the same techniques that you used on the fine sharpening stone, hone the blade with 5 strokes on each side. After this step, your blade should be getting really sharp... if not, start over and repeat the previous steps.
Make Your Blade Razor Sharp  - If you want to polish your blade to near razor sharp... you’ll need to strop your blade . To do this, turn the tool so that the leather strop is up. Grasp the handle with gloves on. Now place your knife on the black guide closest to the handle with the blade facing down and away from the leather. Maintain the angle set by the guide while you push the knife up and over the guide and away from you. Now repeat this step using the guide on the other side by pulling the spine side of the blade up, and over the guide and toward you. Alternate for a total of 10 strops - 5 on each side... Now you should have a really sharp blade. And if not, repeat the previous steps. BONUS Tip For more advanced sharpening techniques and to learn how to reset or fix a damaged blade... see my “Knife Sharpening Bootcamp video #2 - “The Key to a Shaving Sharp Knife”
It Sharpens Recurve Blades Too...  Now I get a LOT of questions on how to sharpen recurve blades... Again... the Worksharp comes though and makes this easy with the large ceramic hone and preset guides. To start, position the tool so that the large ceramic rod is facing up. For survival knives you can use either the coarse or fine side of the rod - as designated by the C (for coarse) and F (for fine on the dial). The coarse setting will give your edge a bit more bite which can be good for survival and utility tasks. Or use the Fine setting for hunting, pocket knives or a really fine hone on your survival knife... Use the same technique of 5-10 strokes on each side until your blade is sharp.
Sharpen Serrations  - This tool can also sharpen serrations... by using the large or small ceramic rods. Choose the size that best fits each serration. To sharpen serrations, choose the ceramic rod that fits the size of your serration the best. Now match the bevel angle and use a push / pull motion... 5 strokes on every serration should do for touch up work...
  BONUS Tip For damaged or really dull serrations I like to use the Smith’s Pocket Pal with its cone-shaped, diamond sharpening rod.
Sharpening Hooks  For the obsessive fisherman, this tool has a special set of grooves on the large ceramic rod to make sharpening hooks easy. Simply turn the red dial to the HOOK shape... and run your hook back and forth in the slot...
Sharpening Broadheads 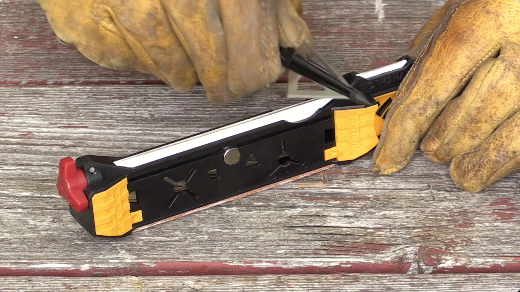 - And last, but not least... the broadhead arrow wrenches under the fine plate make removing arrows for honing easy. With leather gloves on, and some care, you can use the ceramic rod and strop to touch up your broadhead blades.
Bummers About this Tool - For all the great attributes of this tool, there are a few bummers... First... in making an easy-to-use, universal field sharpening tool... the 20 degree angle guides are awesome as long as the bevel of your edge is close to 20 degrees. Now on the upside, I’ve found that many of my knives are a close match and so I CAN use the built-in guides. But for those that don’t match, you’ll either have to reset the edge or sharpen without using the guides. Next, over time the leather strop can dry out... so rubbing in a light coat of mineral oil will help. Lastly... I wish this tool came with a cool little pouch or sheath... To solve this, I now wrap mine in some canvas and tie it shut. 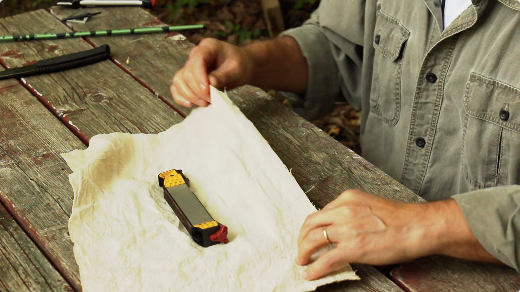
One last thing... I have sharpened blades up to 7 inches on this little guy, but anything larger like bolos and machetes are tricky... And although you can hone hatchets and axes with it... I still prefer a double sided sharpening puck. ________
Easy and Versatile Tool 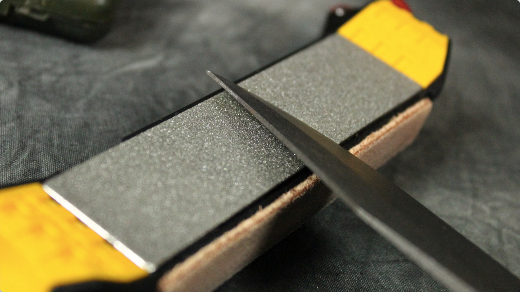 - These small issues aside... I haven’t found a more easy-to-use, versatile, capable and portable field sharpening tool for travel, camping, bug out bags and survival training. With a 4.6 out of 5 star rating on Amazon, it looks like the Work Sharp Guided Field Sharpener has lots of fans that comment on its portability, ease of use, and affordability ... with a street price around $25 - $40 US (at the time of this review)... and how it gets knives sharp, even for beginners.
Other Sharpeners to Consider - For a classic crock-style field sharpener... at about half the price of the Worksharp - Check out the Lansky 4-Rod Turn Box Stick Sharpener. For sharpening knives in the workshop, check out the DMT DuoSharp, 2 grit diamond sharpening system... or the Lansky Guided Sharpening Kit. And when power is available - it’s hard to beat the WorkSharp WSKTS Knife and Tool Sharpener. _______ We’ve just taken a look at the Work Sharp Guided Field Sharpener. Here's our full review and tutorial on YouTube...


Leave a comment